Marketing Cloud Personalization is a separate product, but it is a part of Marketing Cloud Engagement UI. Unfortunately, it does not have a native connection to the core Marketing Cloud. There are several ways to integrate the data between Personalization and Engagement, and one of them is using direct segment sending to the Journey Builder. Let’s see how we can create this type of integration and its benefits or disadvantages.
Table of Contents
- When should you use Journey Builder export?
- Create a sendable Data Extension in Marketing Cloud
- Create the Event Definition in Marketing Cloud
- Set up the Journey in Marketing Cloud
- Export the segment to Journey Builder
When should you use Journey Builder export?
As you may know from the article about sending user data from MCP to MC methods, segment exporting to Journey Builder utilizes the ETL to send users to the Marketing Cloud Engagement by automatically adding new users to the defined Journey. It is a simple and pretty powerful way to add users without building any additional processes to handle data sending or data processing.
You should use Journey Builder export if you want to send segments with users that will be used in the email channel journey activities. Note also that you cannot use this method when you want to send segments calculated daily. It is also more complicated than CSV segment export which is perfect for one-time export scenarios.
Now we know in which situations Journey Builder export will be perfect. Let’s move to the step-by-step guide. 😉
Create a sendable Data Extension in Marketing Cloud
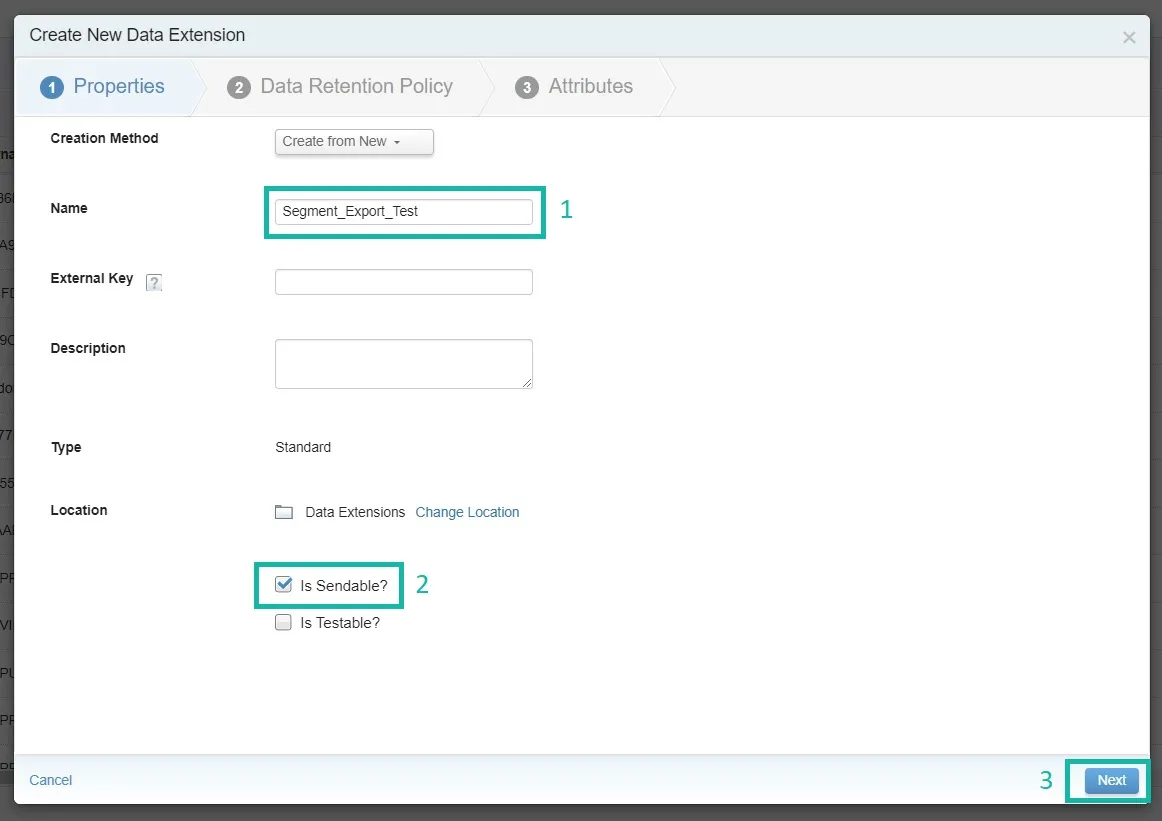
First, you need to create the sendable Data Extension. To do it, navigate to the Contact Builder, open the Data Extensions tab, and click “Create”. Then:
- Select a Name for the Data Extension.
- Check the Is Sendable? checkbox.
- Click Next.
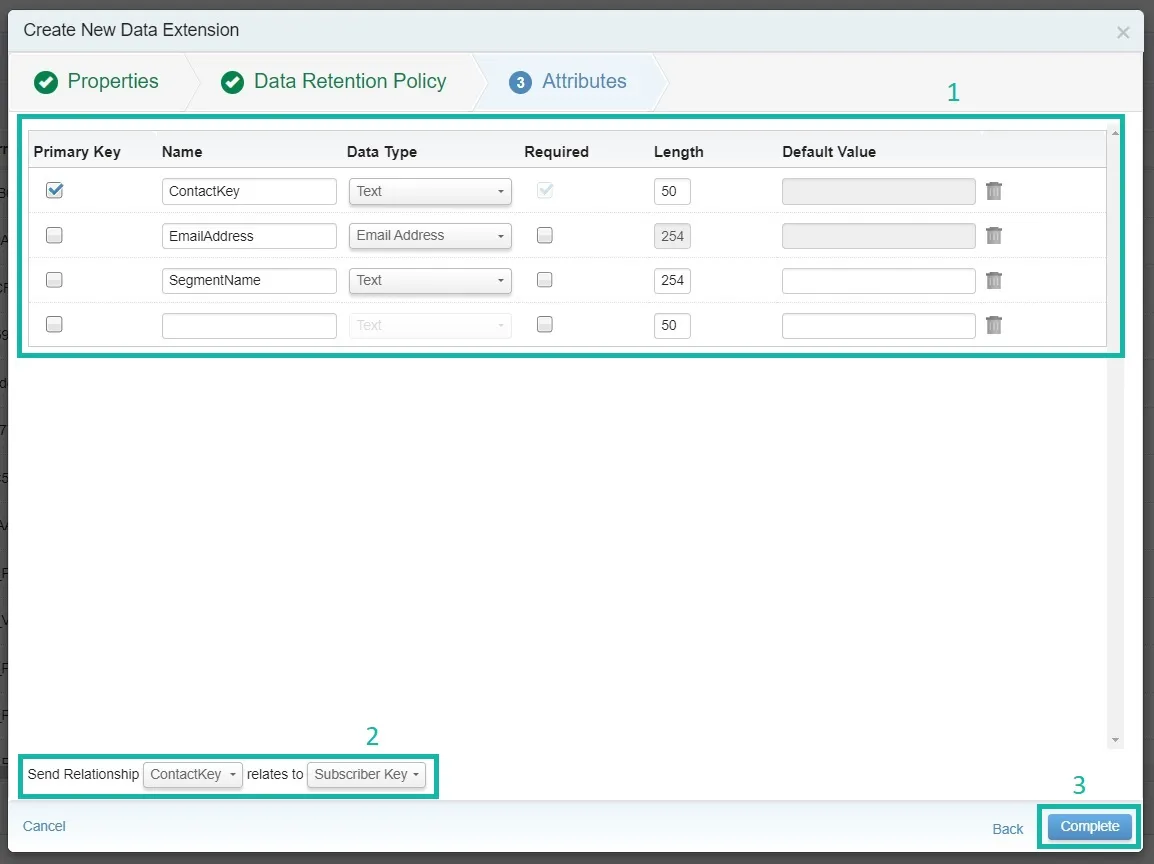
Now, let’s create the Data Extension fields, regarding the documentation:
- Create the ContactKey field with Text Data Type, set it as Primary Key Required, then create the EmailAddress field with Email Address Data Type, and SegmentName field with Text Data Type.
- Set the ContactKey relationship to SubscriberKey.
- Click Complete.
That’s it. Our Data Extension is ready to be added to the Journey Builder Event Definition.
Create the Event Definition in Marketing Cloud
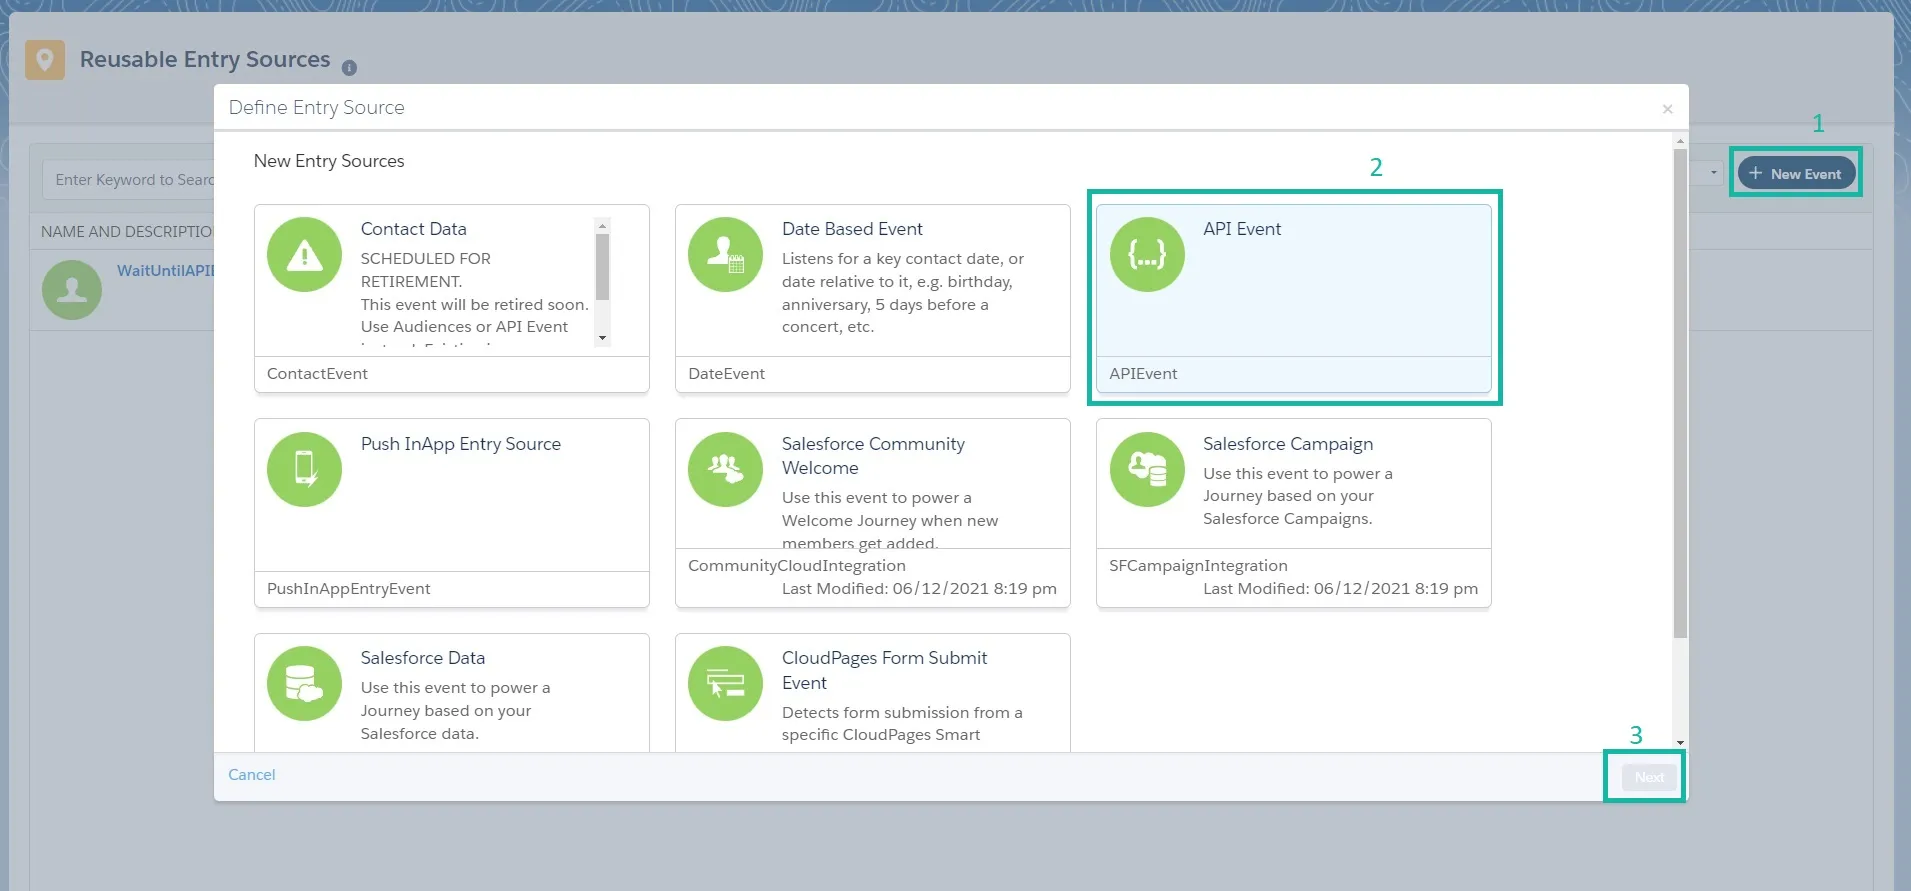
Before moving to the Journey Builder, you must create an API Event Entry Source. Go to the Journey Builder and open the Events tab on the menu bar. Then click New Event. (1), and choose API Event (2). Click Next (3).
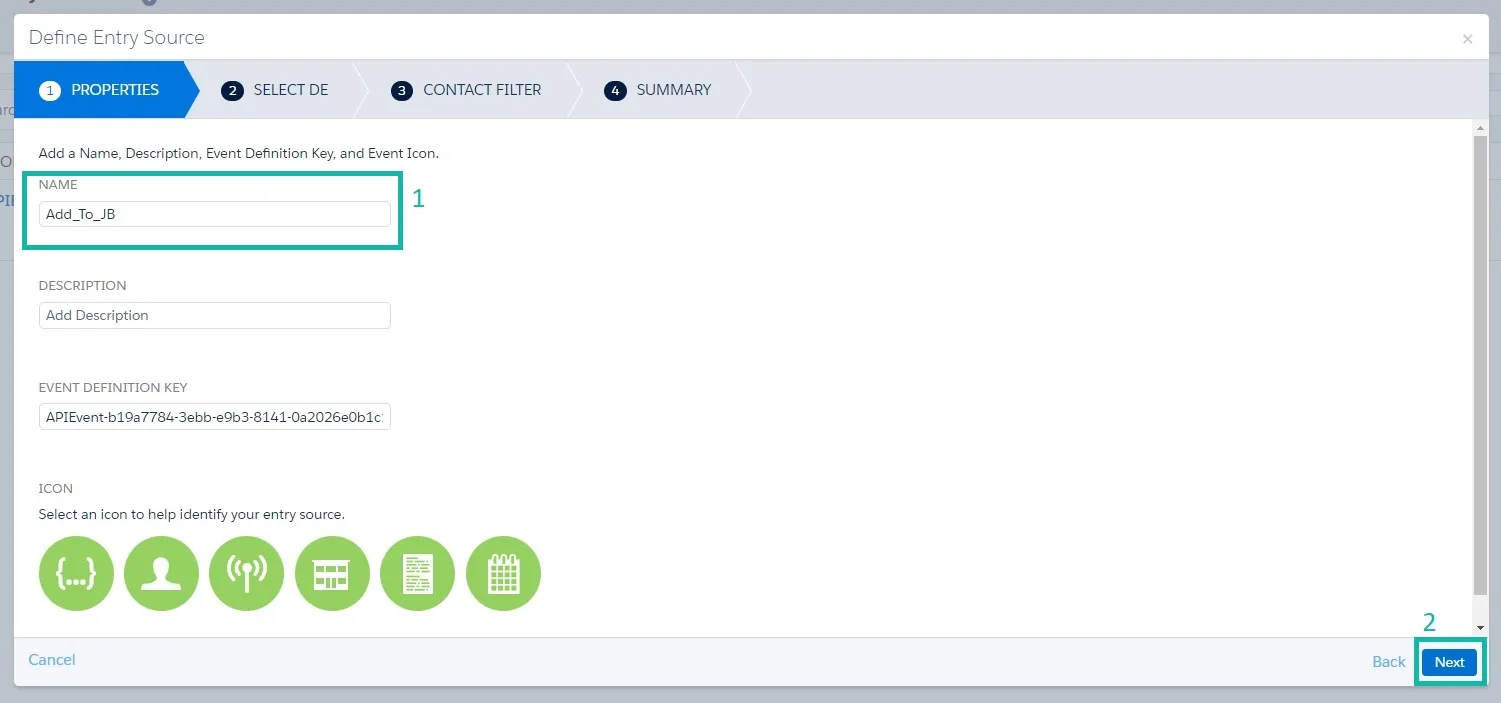
Now, you must choose a name for our Entry Source (1) and click Next (2).
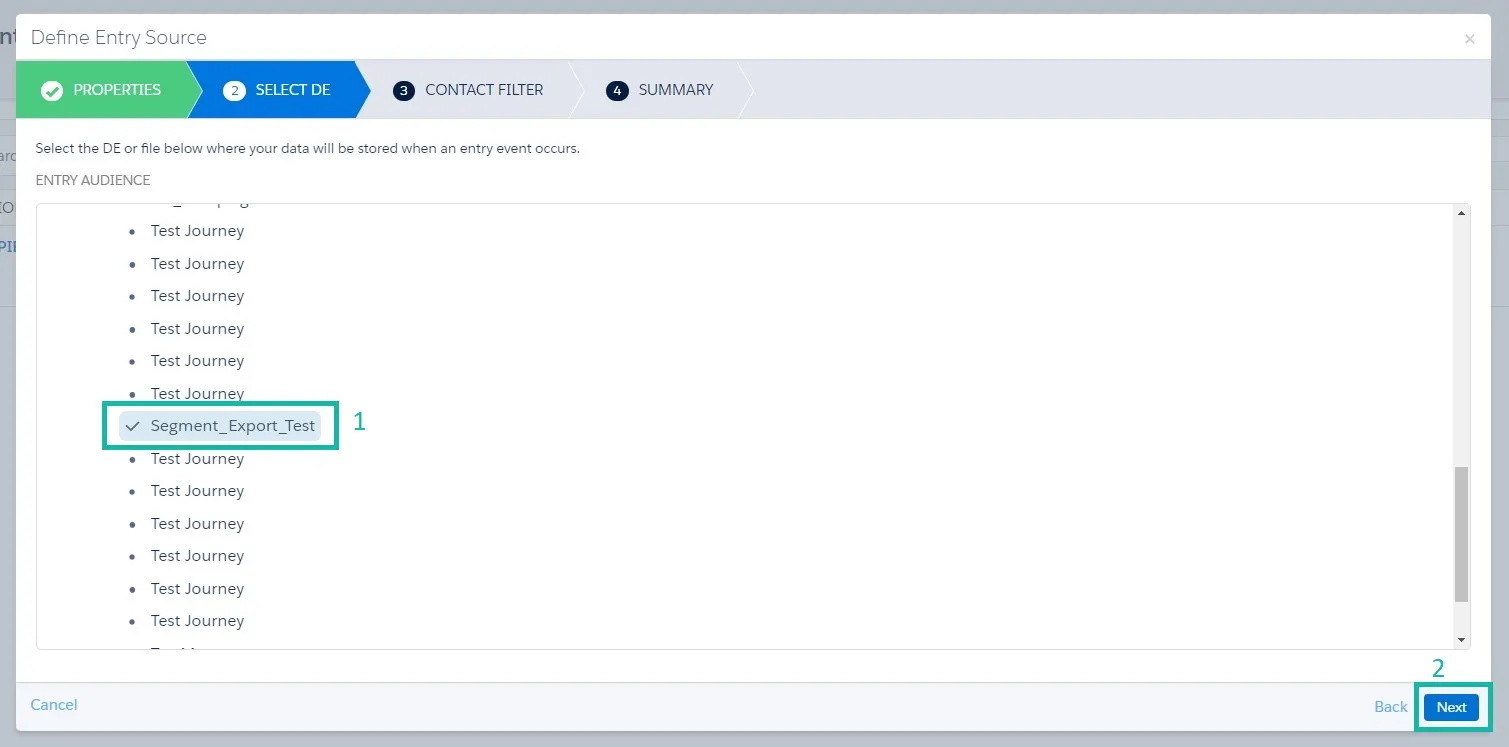
Next, Find and choose Data Extension (1) and click Next (2).
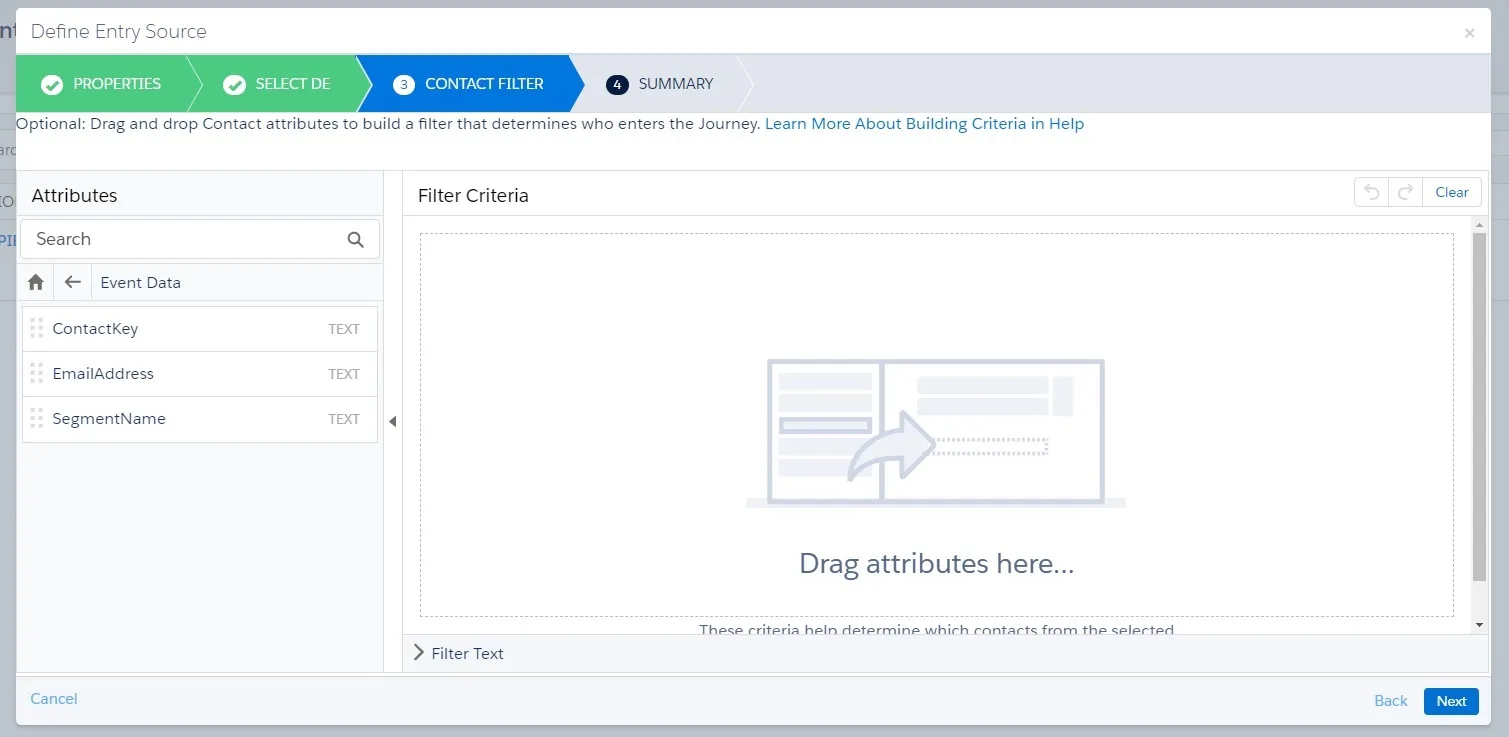
In the next step, you can optionally add Contact Filters to the Entry Source, but we can also do this later in the Journey Builder. That’s all, then we will see the Summary, you can click the Done button to finish the configuration.
Set up the Journey in Marketing Cloud
The last step in the Marketing Cloud Engagement will be creating our Journey. Navigate to the Journey Builder and create a new Journey, choose the Multi-Step Journey, and set Email as a channel.

Now, choose the API Event as an Entry Source (1) and select the created API Event (2). Then you can optionally filter contacts and click Done to finish the configuration.
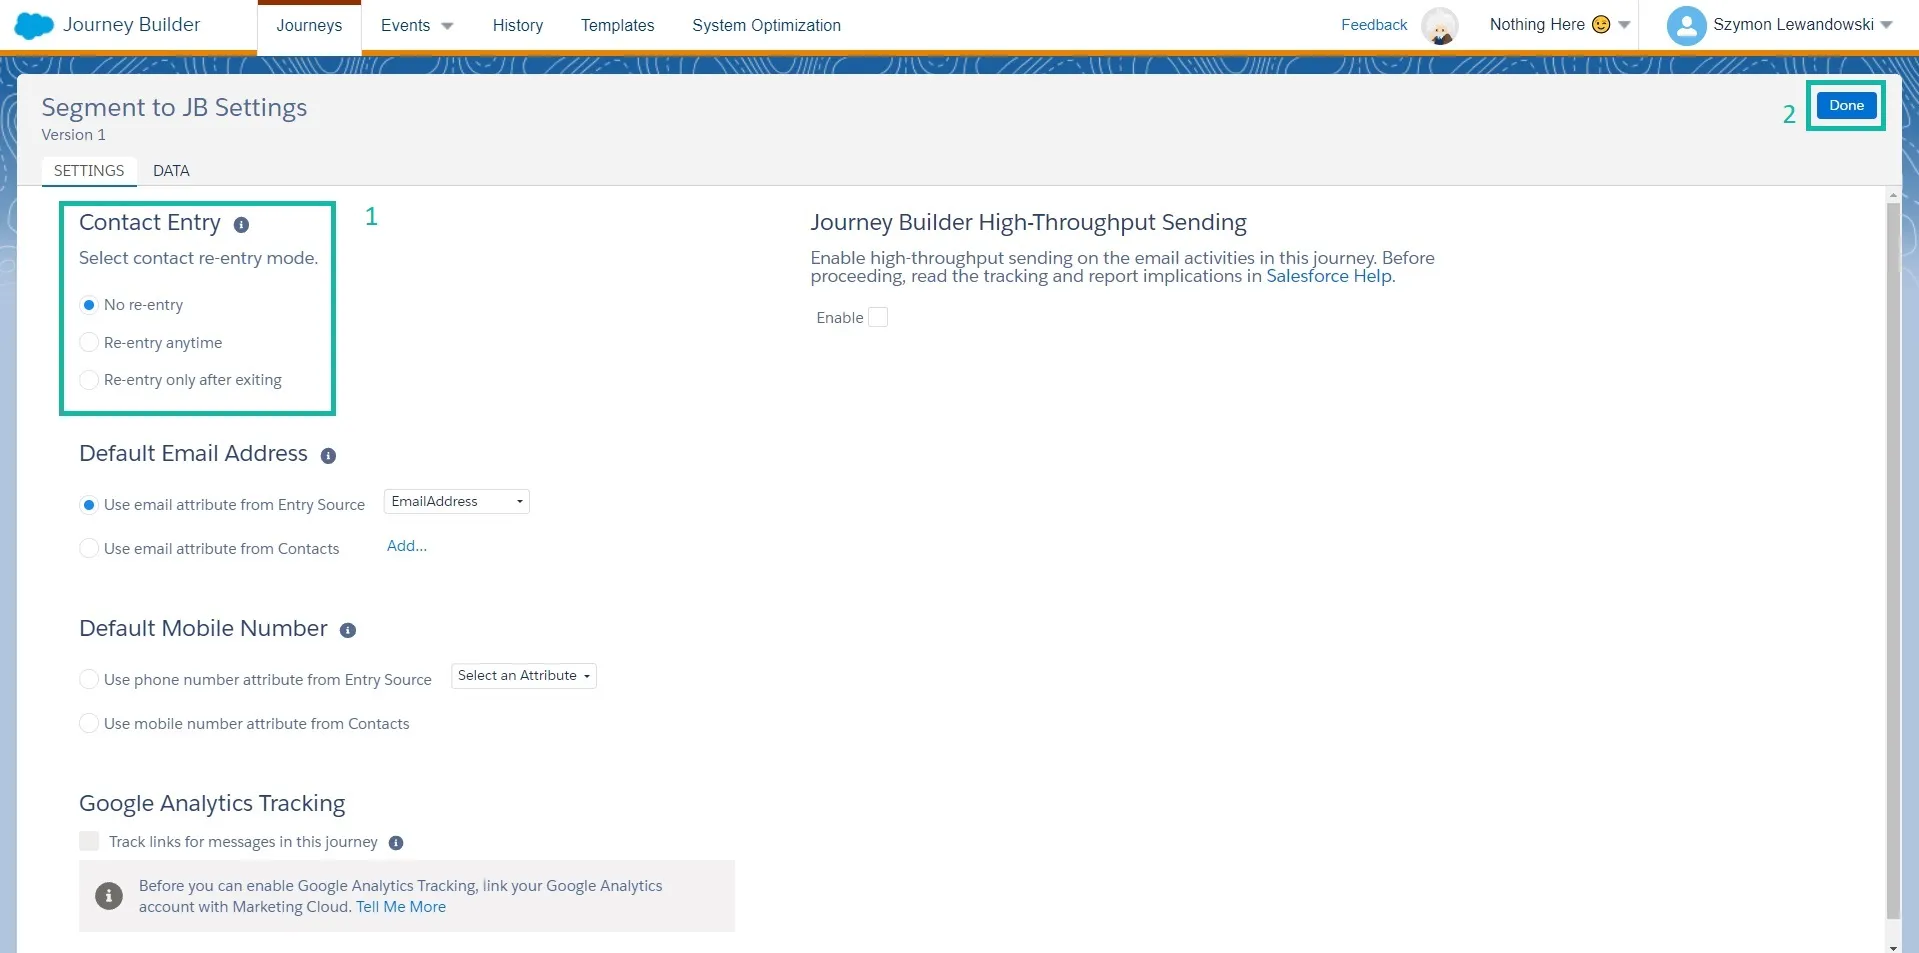
Before we finish the Journey, let’s go to the settings by clicking the gear icon. Choose here the Contact Entry mode (1) and click Done (2).
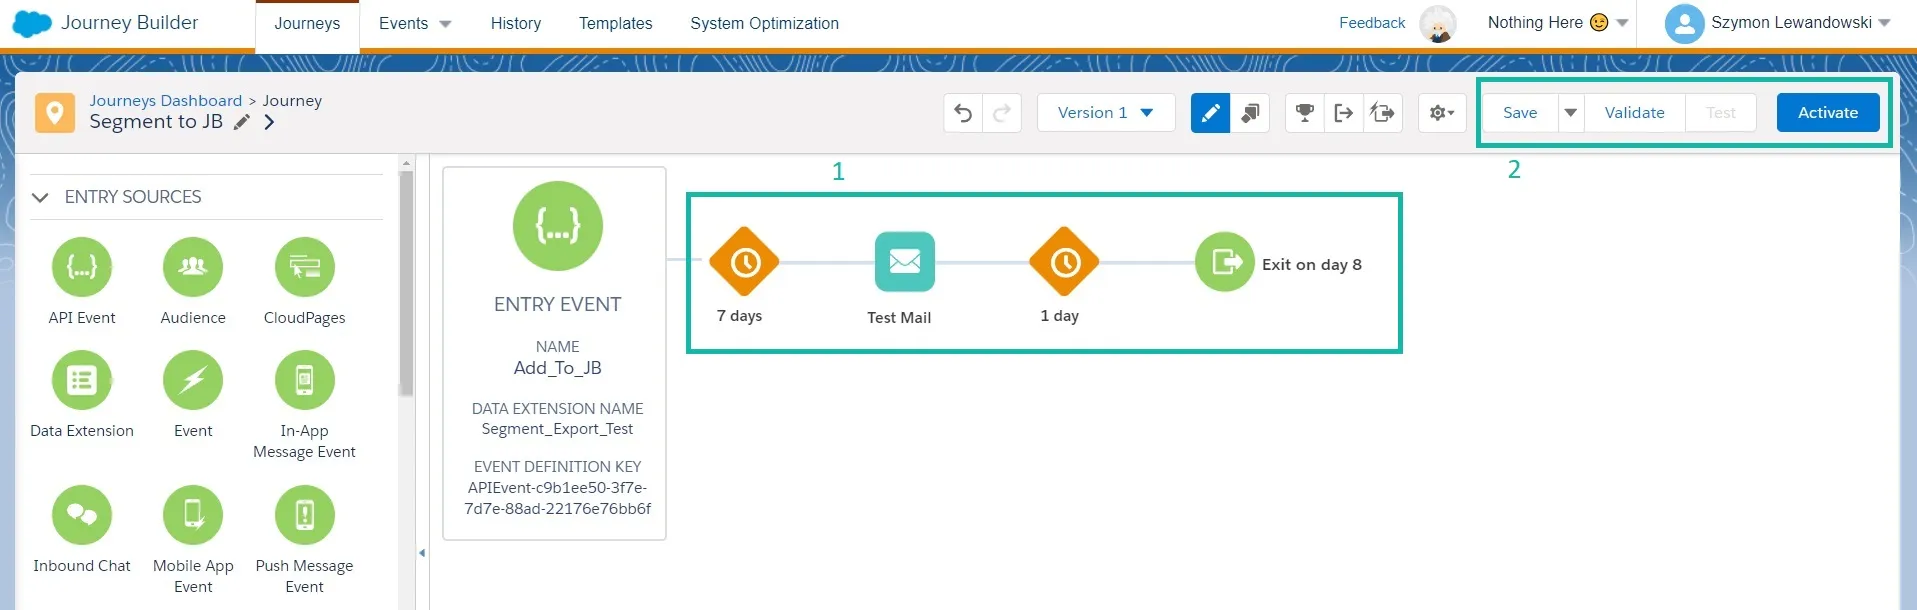
Now, you can build your Journey (1), and optionally change its name. Then click Save, Validate, and Activate (2).
With the published Journey, we have all that we need to export the Segment from the Marketing Cloud Personalization. So let’s move to this tool.
Export the segment to Journey Builder

Exporting the segment with a ready Journey is quite easy:
- Navigate to the User Segments -> User Segments.
- Choose the segment that you want to export.
- Click Edit.
⚠ Don’t export segments that updates on daily basis, this may end with skipping someone that will join the segment due to ETL population delays.
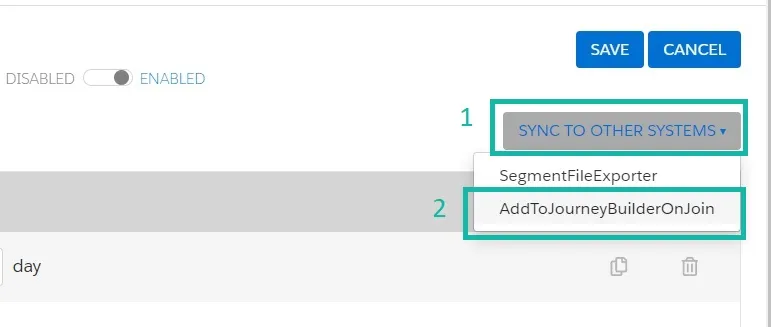
- In the segment edit, click the Sync to Other Systems button.
- Then, choose AddToJourneyBuilderOnJoin.
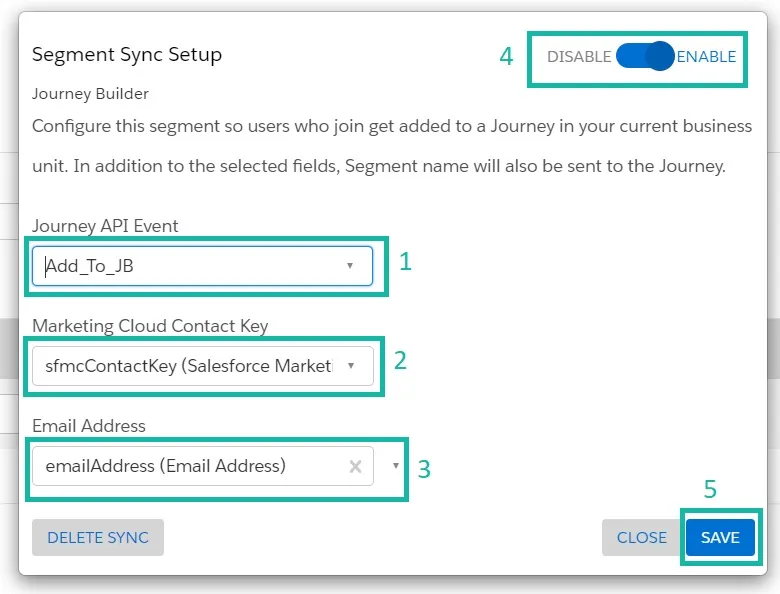
- In the displayed popup, choose your Journey API Event.
- Choose the sfmcContactKey as the Marketing Cloud Contact Key.
- Choose emailAddress as the Email Address.
- Enable the segment export.
- Click Save.
⚠ You can send only one attribute, which is usually an email address.
Now, you have ready segment export. It will occur in the next synchronization time. Remember that everyone joining the segment will be sent to the Journey Builder so configure the segment correctly or use additional filters in the Journey Builder!
Thank you for scrolling down there. I hope that this guide was helpful. 😉
Read also: How to send user data from Personalization to Marketing Cloud
Sources: