In Salesforce’s ecosystem, Personalization is a standalone product providing real-time recommendations and tracking user behavior on the website. Although being a part of Marketing Cloud Engagement, it lacks native integration. This article explores the use of CSV files to export data from Personalization to the Marketing Cloud.
Table of Contents
- When you should use CSV export?
- Export Segment Data to CSV
- Import CSV Segment Data to Marketing Cloud
When you should use CSV export?
Let’s make it clear - the CSV export is the most basic way to export and import data from Personalization to Marketing Cloud. It is a fully manual operation. It is also limited to specific areas of data that are imported, e.g. single segment data, actions data, campaigns data.
But it could be useful when we need to perform a single data export, e.g. batch user data export, single-time segment export, or for testing purposes. Remember, that there are way more effective methods like using SFTP and Automation Studio, using the Add To Journey Builder option, and more, which I will cover in future articles.
Export Segment Data to CSV
Let’s see how we can export the user’s segment data to a CSV file. We can do it with not only specific segment data but also with using the Recent Visitors activity report or All Users section in the User Segments. First, we will see how to navigate to a specific section and trigger the Export menu, and then we will cover what we can export.
Recent Visitors
The first option is to download the CSV file with recent visitors from a defined time attribution window. It refers to the users who have recently visited our website.
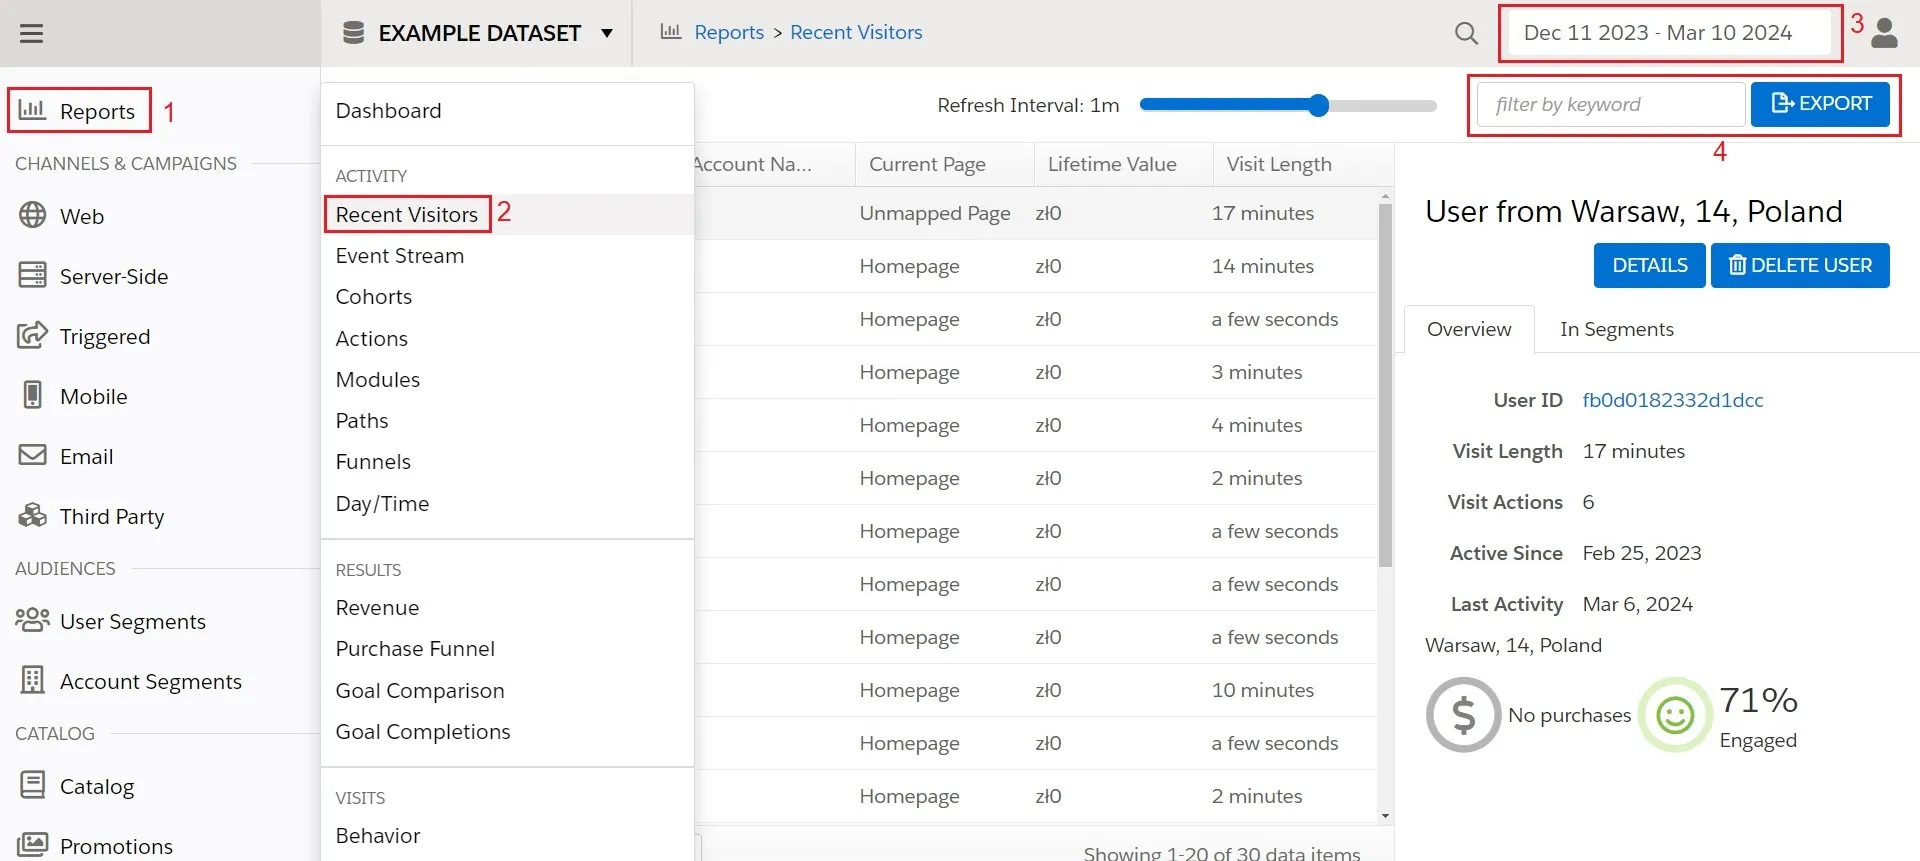
- Click on Reports in the menu
- Choose Recent Visitors in the Activity section
- Define the Date Range
- Optionally filter by keyword and click the Export button
After these steps, a Segment Export window will pop up (see How to export segment to a CSV File). No idea why it is called here “Segment Export”, but you will see the same window in other places where the user’s data can be exported.
All Users
You could also export all users from the MCP. To do so, you should find the All Users tab and export users from this view.
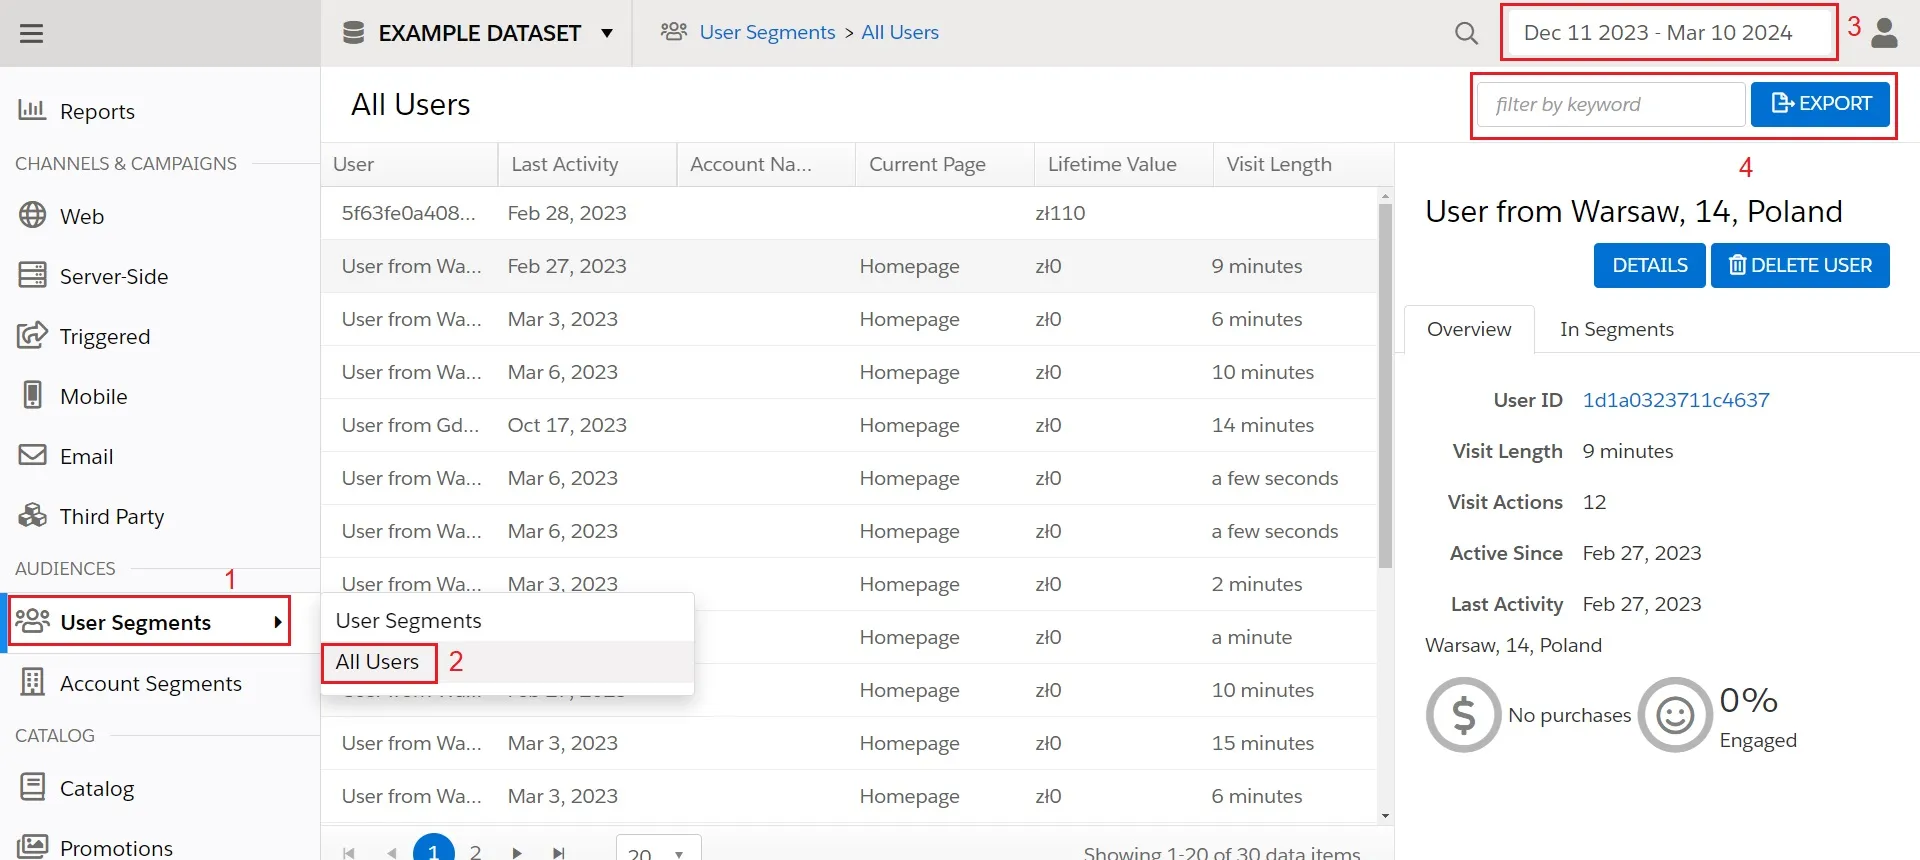
- Click User Segments in the menu
- Choose All Users
- Define the Date Range
- Optionally filter by keyword and click the Export button
After these steps, a Segment Export window will pop up. Again no idea why it is called Segment Export.
User Segments
You can export users from specific segments, that are based on behavioral and technology data about users. It is a cool option to export only these users, who match our requirements, e.g. view a specific page, perform specific actions, or use a specific type of device or browser.
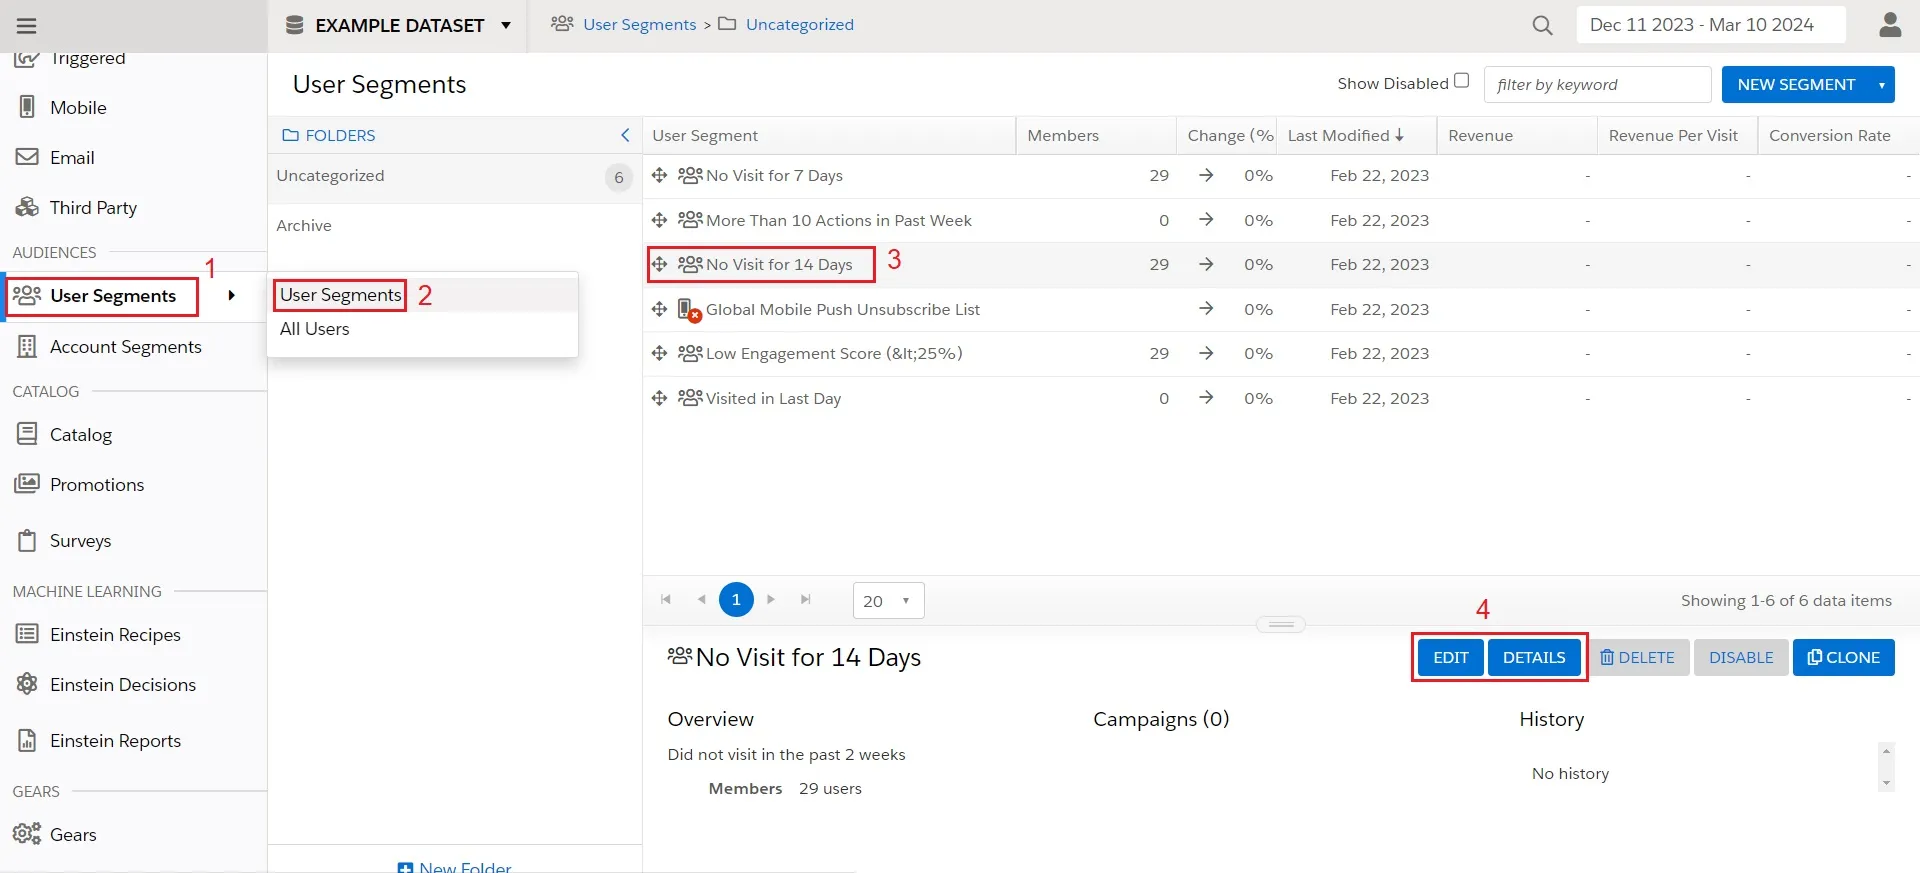
- Click User Segments in the menu
- Choose All Users
- Define the Date Range
- Optionally filter by keyword and click the Export button
Now we are in the Segment details, where we can edit the segment, view information about it, and see the users that joined the segment.
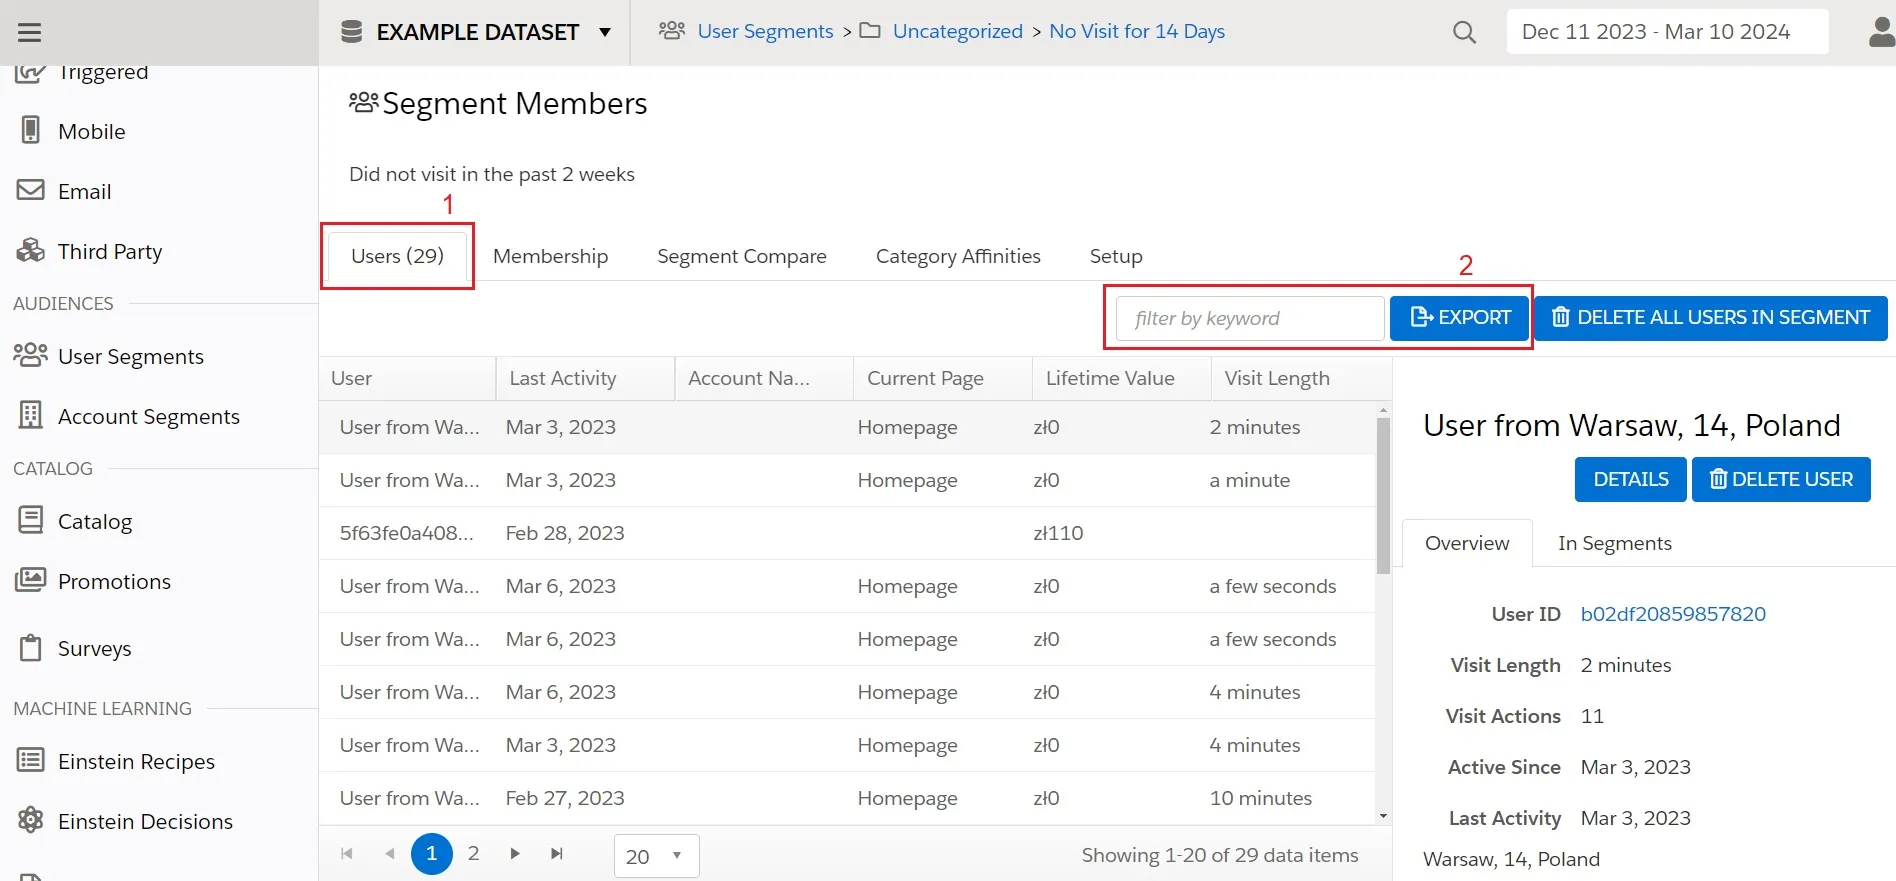
- Click on Users tab
- Optionally filter by keyword and click the Export button
Export segment to a CSV File
Exporting user’s data to CSV file looks the same in all above scenarios (Recent Visitors, All Users and User Segments). Let’s see what is coming on after clicking the export button.
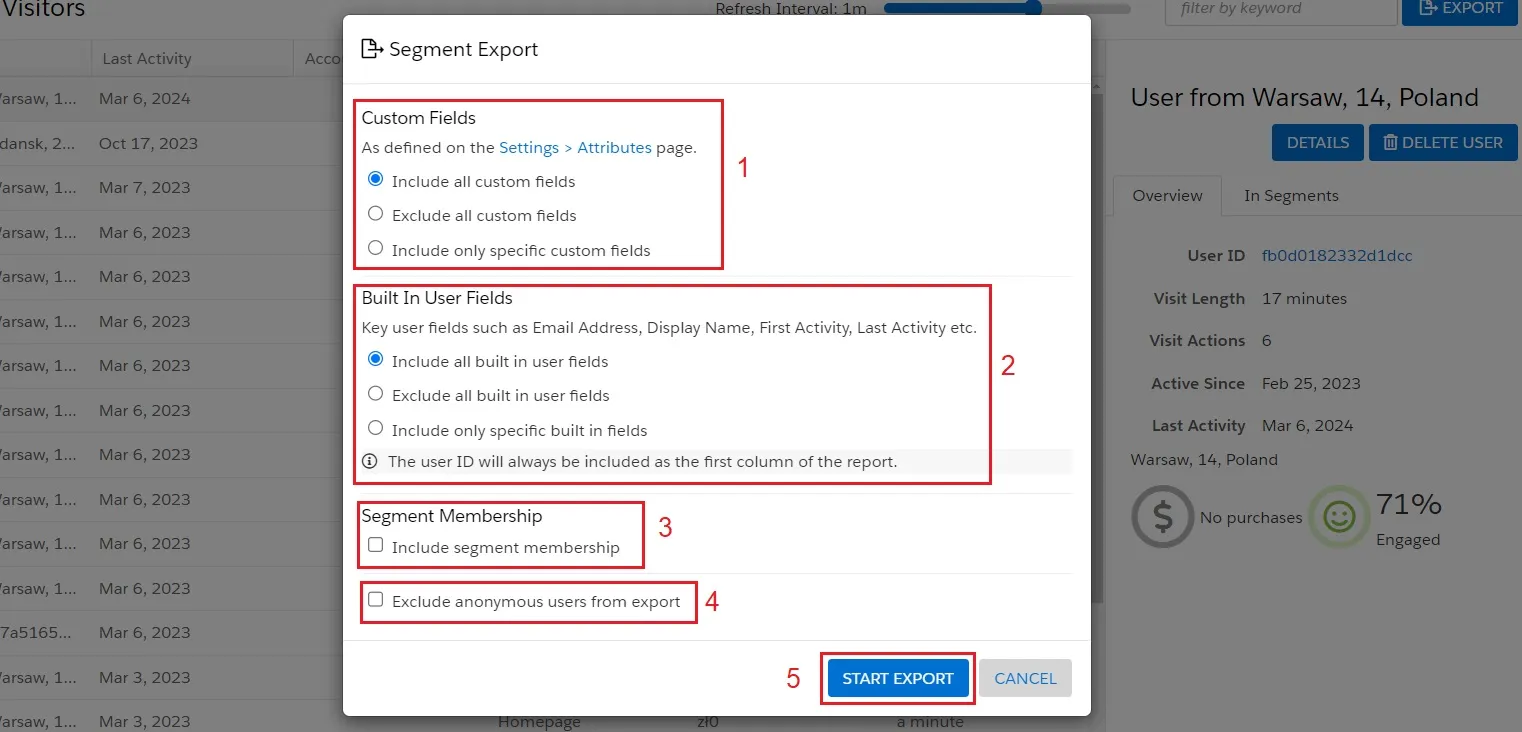
- Define the Custom Fields (User Attributes) that will be added to the file:
- Include all custom fields - all custom fields will be added.
- Exclude all custom fields - all custom fields will be excluded.
- Include only specific custom fields - you can choose fields that will be added in the appearing dropdown menu.
- Define the Built In User Fields (such as e.g. Engagement Score, Segment Membership or Total Actions) that will be added to the file:
- Include all build in user fields - all built in fields will be added.
- Exclude all built in user fields - all built in fields will be excluded.
- Include only specific built in fields - you can choose fields that will be added in the appearing dropdown menu.
- Segment Membership - decide if you want to include user’s segment membership.
- Exclude anonymous users from export - decide if you want to export only known users or also anonymous users.
- Click Start Export to download the CSV file
⚠ Adding Segment Membership in the Built In User Fields (2) will provide you an option to choose segment membership for defined segments. In the separate Segment Membership (3) you can instantly add all segment membership.
⚠ You will find User Attributes in Custom Fields. What’s more, this section also includes the Built-In Identity Types - if you use the Include all custom fields option, you will add not only the User Attributes, but also the Email Address, Profile Id, Salesforce Contact Id, Customer Id and Salesforce Marketing Cloud Contact Key. Even if some of the fields will be blank or even do not exist as User Attribute in your Personalization instance. If you want to shorten the CSV columns list, use the Include specific custom fields option.
Import CSV Segment Data to Marketing Cloud
After downloading the CSV file, it is time to import it into Marketing Cloud. Unfortunately, there is no built-in creator for quickly importing CSV files and instantly creating a new Data Extension (DE). First, we must build a proper DE and then import the CSV into it.
Check the headers in the CSV file
To build a Data Extension for a CSV file, we should know the columns that should be in the DE. We can try to open the CSV file and look after the first line when we will find the column names. It won’t be very comfortable to do so, but it will be quick and simple for small CSVs.
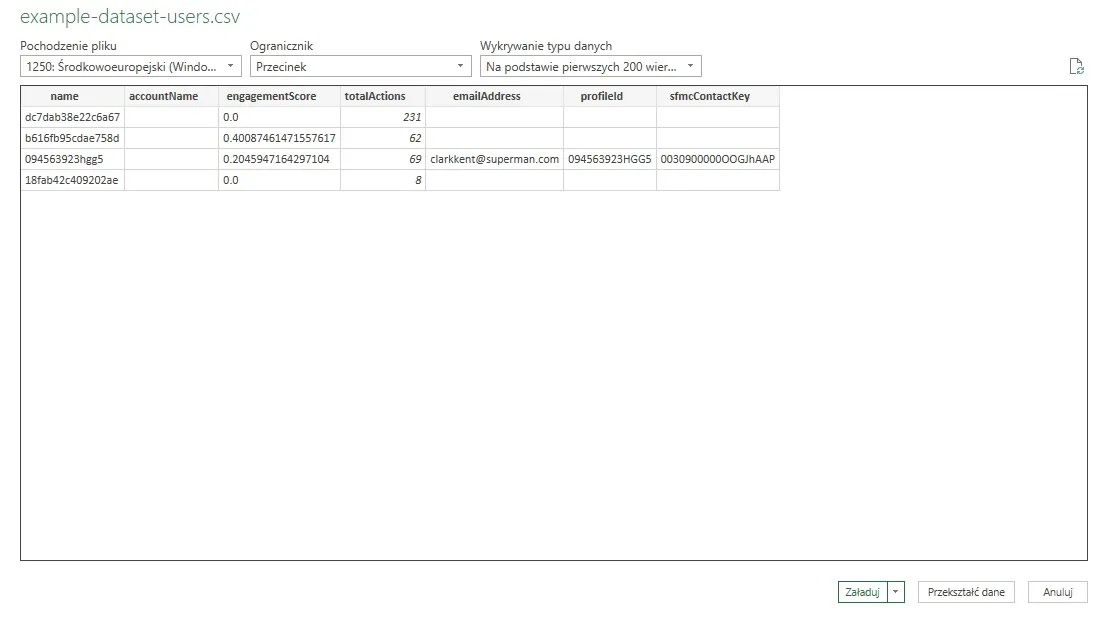
There is also a way to import the CSV file into a spreadsheet program like Microsoft Excel or Google Docs and check the headers more comfortably with the UI. With this tool, we can also easily check what should be the data type for the specific records.
Create the Data Extension for CSV file
If we know the columns for our table, we can now create the Data Extension. You can follow the guide in the official documentation that has got information about creating target Data Extension for our import.
- Navigate to Audience Builder -> Contact Builder.
- Click Data Extensions in the top menu.
- Click the Create button in the right top corner.
- Use the Create from New creation method and type Name.
- Optionally set the Retention Policy.
- Add the attributes that are in the CSV file headers.
- Click Complete
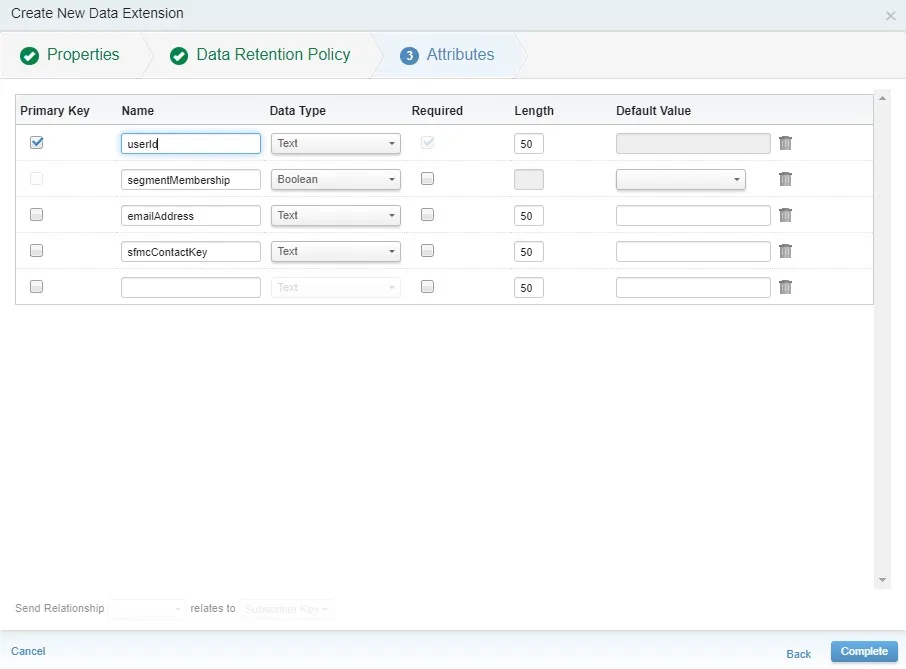
In this scenario, I will use only the required fields in the Data Extension and skip the segment information. If you have more attributes in your import, create new attributes that you want to add. Note that the segment membership is presented as the array, so to further use this information you will have to extract the values on your own.
Import CSV file to the Data Extension
Let’s open our created Data Extension. We can see that all of our attributes has been added correctly. Now let’s import our CSV file.
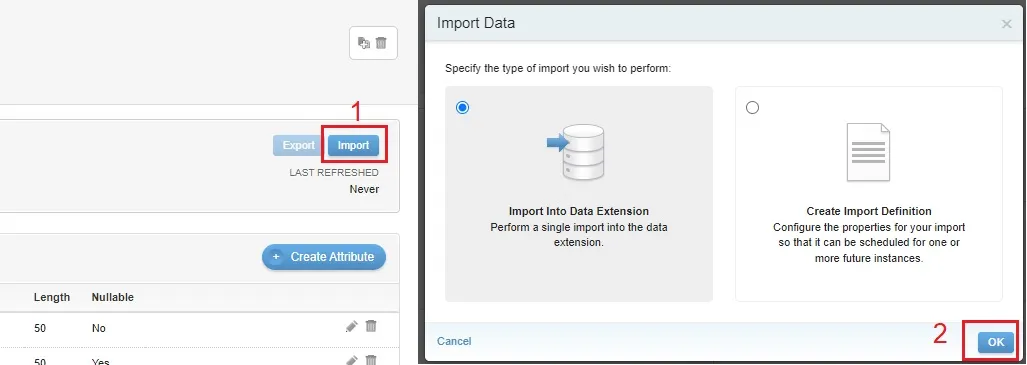
- Click the Import button on the right side
- Choose Import Into Data Extension and click OK
- Choose a CSV file from your Computer
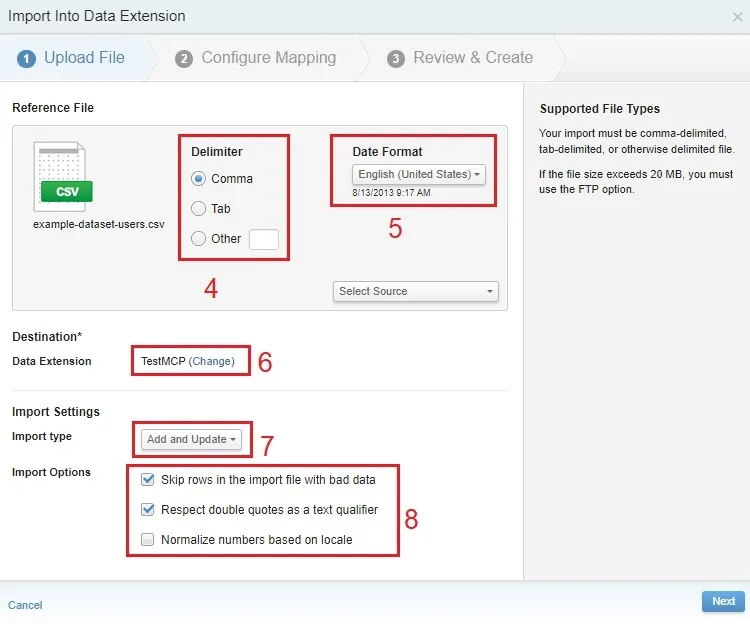
- After choosing a CSV file, set Comma as the Delimiter.
- Choose Date Format (default English).
- Check if you chose correct Data Extension.
- Set the Import type (Add and Update as default, you can use other options if you are for example adding new columns or you want to overwrite all the data).
- Checkmark the Skip rows in the import file with bad data and Respect double quotes as a text qualifier in the Import Options.
- Click Next.
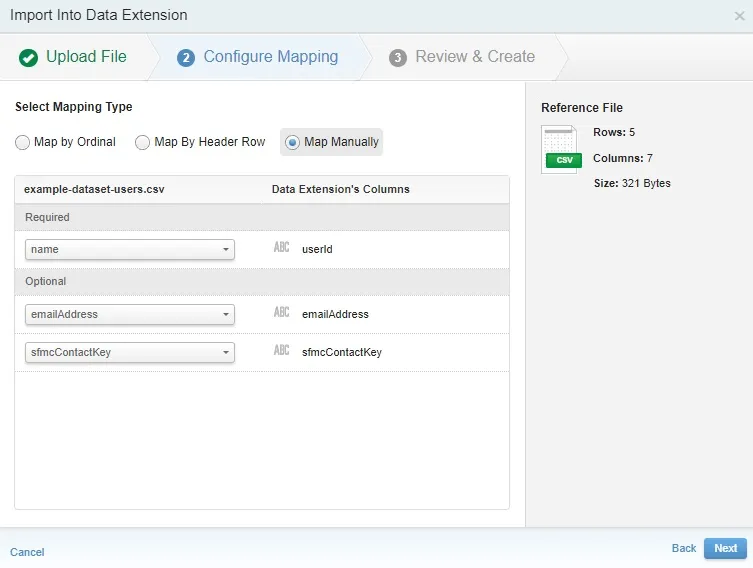
Now, you have to map the data correctly. You can use Map by Ordinal if you map all the data and you have the same column order as CSV headers or Map Manually to set own mapping. If you are done, click Next. Review the setup, set your e-mail in the Notifications section, and click Finish.
After some time, the data will be added to the Data Extension. That’s it!
Read also: How to send user data from Personalization to Marketing Cloud