Personalization is one of the additional products in the Salesforce ecosystem, that provides real-time recommendations and tracks user behavior across the website. It is placed in the Marketing Cloud Engagement but is not natively connected with this platform. So when it comes to accessing data from Personalization in Marketing Cloud, there are several ways.
Marketing Cloud Personalization provides us with three ways to send the user information from this tool to Marketing Cloud Engagement. But in this article, I will show you two more not-so-common solutions that should be applicable in specific cases. Let’s go through all 5 ways to send data from Personalization to Marketing Cloud, with detailed instructions, pros, cons, and practical examples.
Table of Contents
- Before we start
- Exporting data to a CSV File
- Exporting segment to Journey Builder
- Exporting segment to SFTP
- Using Data Cloud Integration
- Using server-side triggered send
Before we start
Marketing Cloud Personalization collects information about users and their behavior. When saying “user data” we should refer to the users and, optionally, their attributes and actions performed across the website or mobile app. Our main goal is to send the user’s e-mail address or any other attribute that will allow us to recognize him in Marketing Cloud.
In these terms, any solution that could send the user’s data (e.g. e-mail address) will be included in this article. No matter if we can send the whole spectrum of the user’s attributes and his behavioral data, or simply the user’s email within a specific context.
Exporting data to a CSV File
Utilizing CSV export stands out as the most elementary approach for transferring data between Personalization and Marketing Cloud. This method involves a completely manual process and is restricted to specific data areas, such as importing singular segment data, actions data, or campaign data.
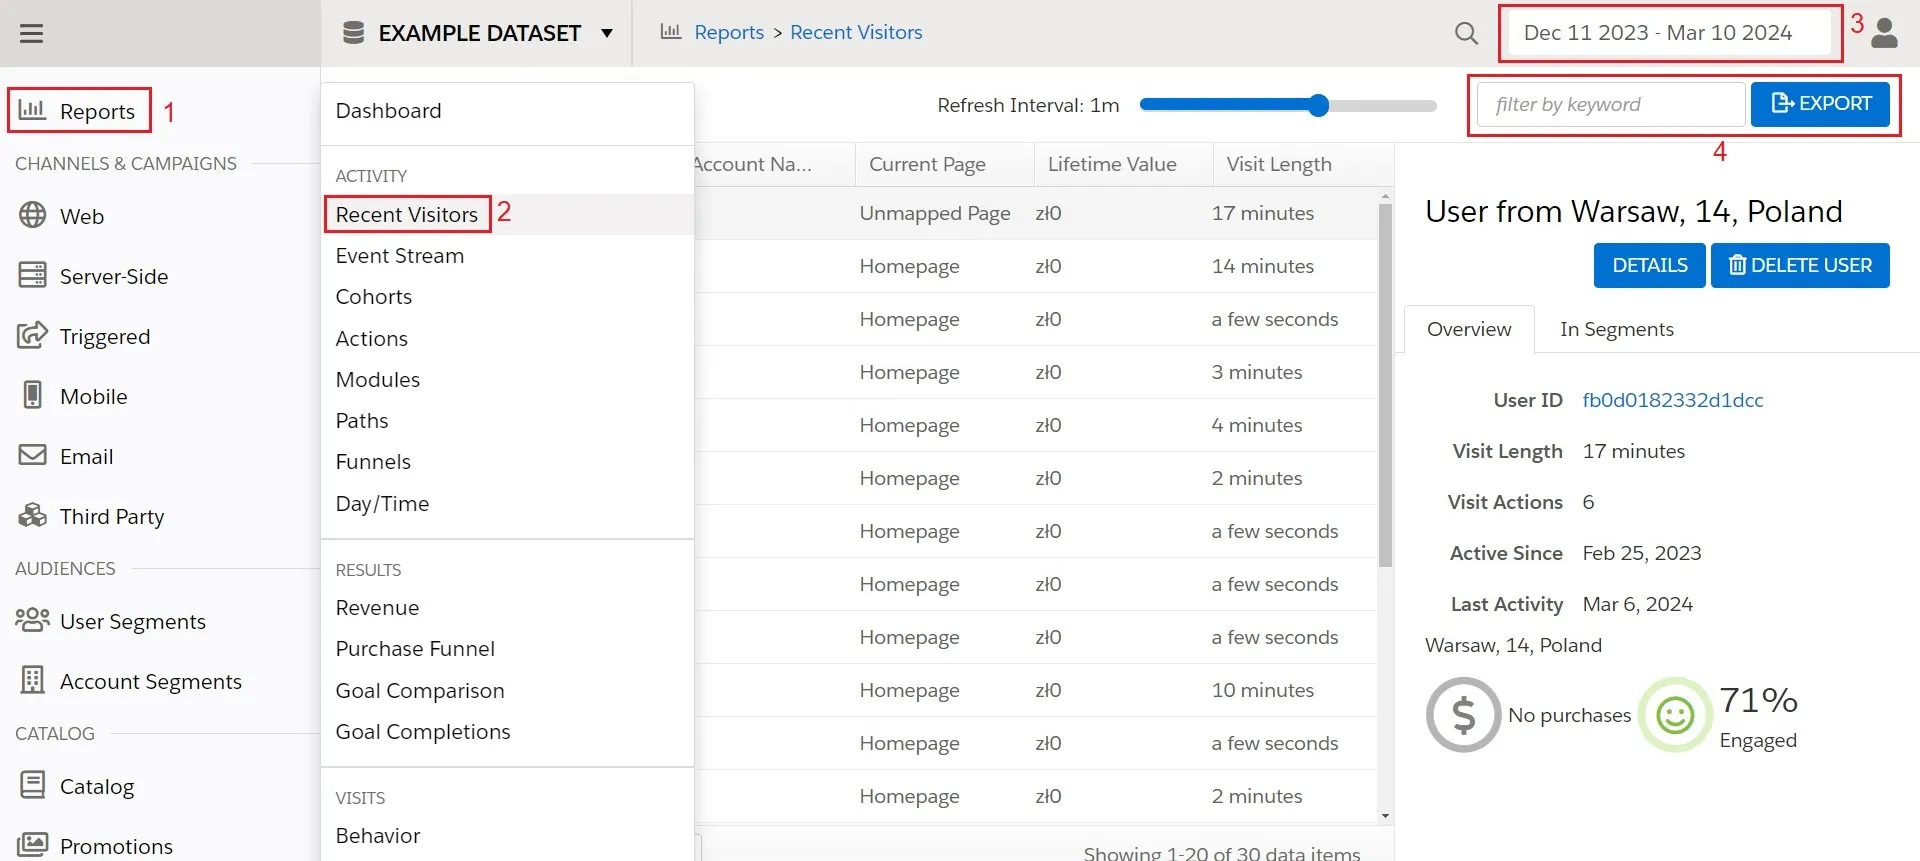
It is one of the easiest ways to export data from Personalization to Marketing Cloud. It requires little knowledge of how CSV files work and how to create a Data Extension and import data to it. While practical for isolated data exports, such as batch user data or a one-time segment export, and for testing purposes, it’s crucial to recognize that more effective alternatives exist.
Want to use the CSV method? Check the detailed guide of exporting Personalization Segments to Marketing Cloud with CSV. 😉
Exporting segment to Journey Builder
The second way to send the data to the Marketing Cloud is to use the Segment activation option called AddToJourneyBuilderOnJoin. This method utilizes the ETL for sending the segment data into the Marketing Cloud and automatically adds new users to the defined Journey. This method is more advanced and requires the creation of the Journey and a sendable Data Extension before starting the export process.
It is a perfect way to easily add users, without building any other “supporting” processes to serve the data transfer. The automated process will add all new segment members directly to the Journey and trigger the Journey for them instantly.
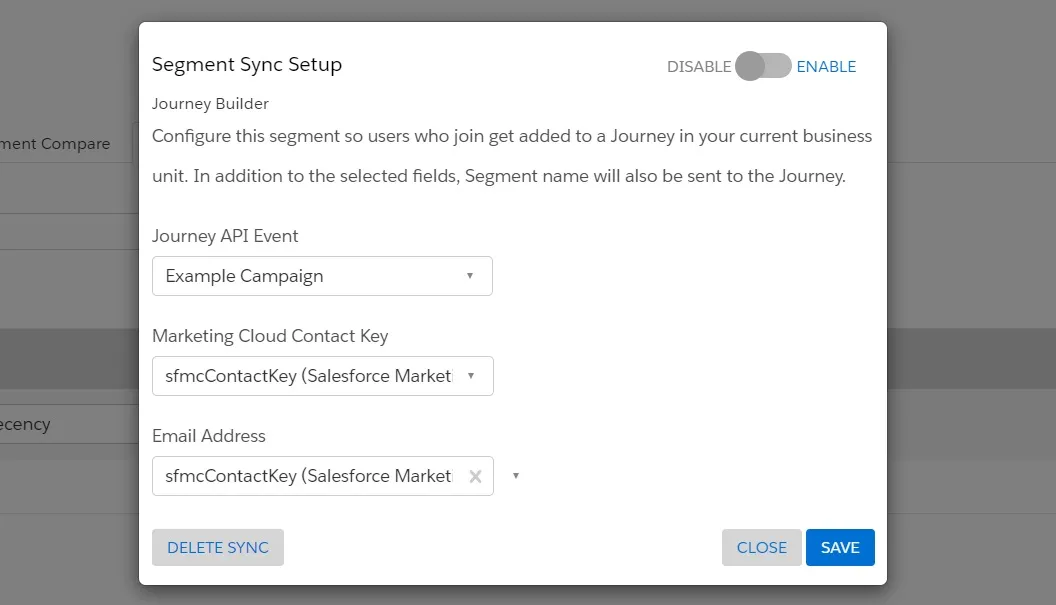
It sounds like a flexible way, but it has some disadvantages. First of all, it can be used to send only these users who already have their sfmcContactKey (the proper way to match the users in the Marketing Cloud, if we do not use email address as ContactKey). Secondly, Journey Builder segment listeners do not support thos segments, which are calculated daily. Next, the user will be immediately added to the Journey. Lastly, we are not able to add any other user attributes.
Check docs for more information about exporting segments to Journey Builder.
Exporting segment to SFTP
In the segment export menu, we can also find the SegmentFileExporter functionality. This is another way that will allow us to send the data to Marketing Cloud, using SFTP. There are two steps - sending the data to Personalization SFTP, and pulling the data from this SFTP to the Marketing Cloud Data Extension. We can achieve those tasks with Automation Studio.
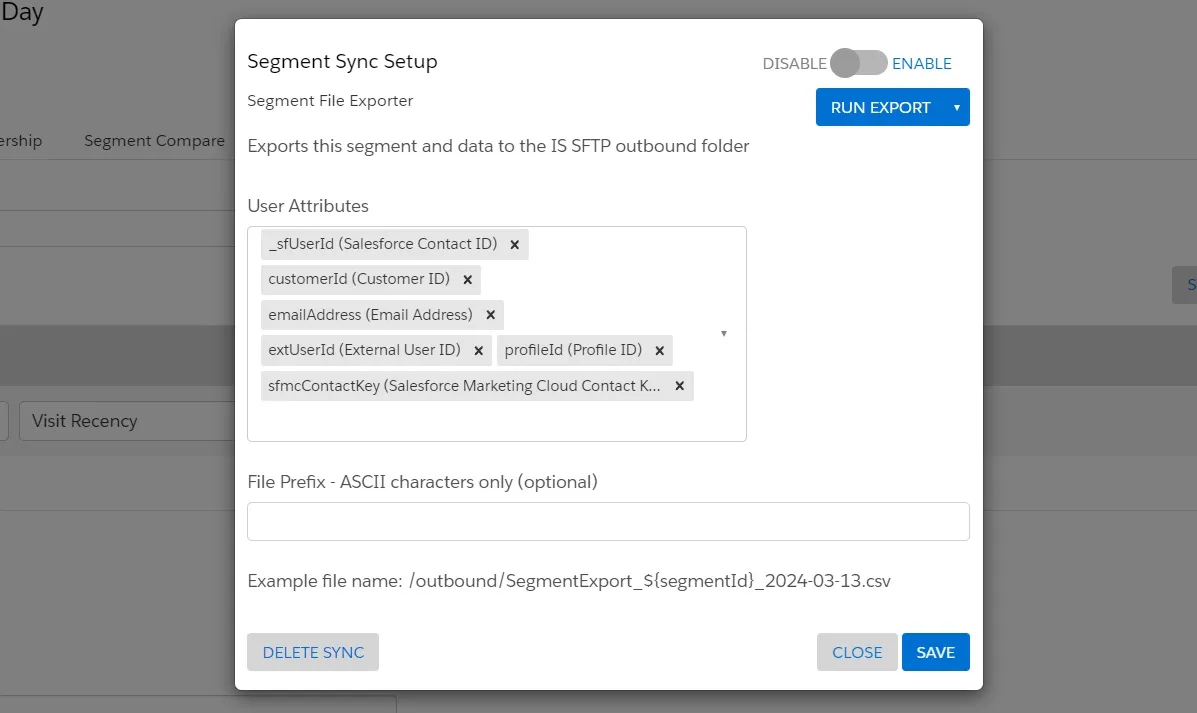
This method allows us to create an automated data-retrieving process, sending user data with all attributes. What is more, it saves the data to Data Extension without triggering any Journey, so we have more control over how the data flow will look like, and when users will be sent into the Journey.
The drawback of this method is the need to manage an additional process in Automation Studio. While not a significant issue initially, it could become problematic when dealing with numerous segments. It’s important to note that importing individual files into the automation may lead to extended import times, and any errors can result in the automation being turned off. Consequently, you might find yourself managing a single problematic automation or dealing with tens of new automations in the folder. What is more, SFTP activation works only once per day, which means that your data won’t be real-time.
Check docs for more information about using SFTP in Personalization.
Using Data Cloud Integration
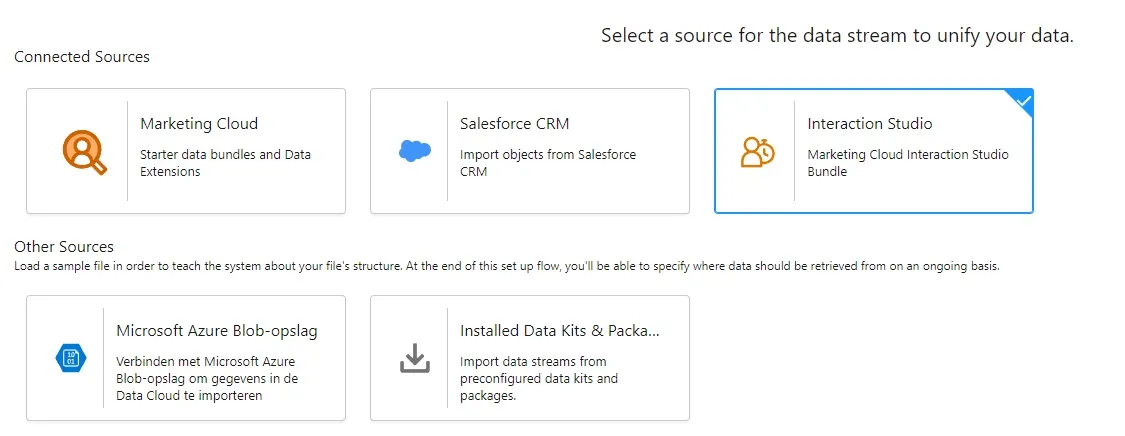
In the era of Salesforce Data Cloud, we should mention this method should be also mentioned. Data Cloud provides a dedicated connector (called Interaction Studio connector) that allows us to automatically populate data from Personalization. After choosing the dataset, the data will be automatically mapped. Then, we can segment the data in the Data Cloud, enrich the segments with data from other sources, and activate the Marketing Cloud.
In terms of treating the Data Cloud as a “Single source of truth”, “Customer Data Platform” or “Master Data Management System”, we should use the Data Cloud as the middleman between Personalization and Marketing Cloud. It will allow us to collect the data in one place. It is hard to show advantages and disadvantages compared to other methods because it is a whole different approach to architecture. Just remember that this option is possible.
Check docs for more information about connecting Personalization to Data Cloud.
Using server-side triggered send
Now we are moving to the ultimate, programming-oriented method. We will need the proper configuration of Triggered Templates and Campaigns that will handle our requirements. Serverside triggered campaigns in Marketing Cloud Personalization are compelling. With access to a lot of the API objects stored in the server-side context namespace, it provides almost unlimited possibilities in terms of sending user data (and other data) to any system, including Marketing Cloud (with Add To Journey Builder).
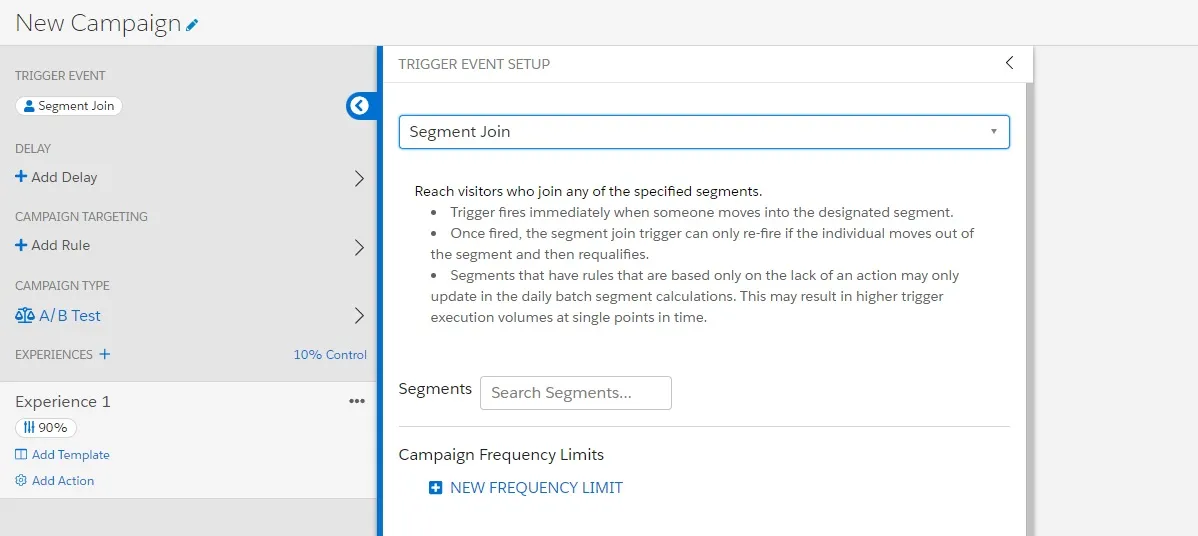
You can check the available user attributes in the insightful article about Serverside Code Context written by Mateusz Dąbrowski. It is an amazing tool for exporting users’ data, and it works in real-time. We can trigger the send directly when the user performs our defined action.
Of course, the most significant advantage can become a disadvantage. Triggered send with server-side code comes with a programming challenge. We must have technical knowledge and spend some time to create a properly working, tested, and stable solution that will return us the data that we want to send.
Check docs for more information about Triggered Campaigns possibilities.